Your spreadsheet must contain a Reference column (called 'Reference'), containing a unique ID for each Business Process, and a hierarchy column, containing the names of each Business Process.
To create the Business Processes in a hierarchy, then you can separate each item with a '>'. For example 'Hire New Staff' will be created underneath 'Hire to Retire', which will be created under 'Recruit to Retiring'.

Step 2 - Setting up Classifications in the Spreadsheet.
For setting classifications, make sure the classification has been created and exists first. Note that the text in the source file must be an exact match to the FusionGraph classification value otherwise nothing will be set.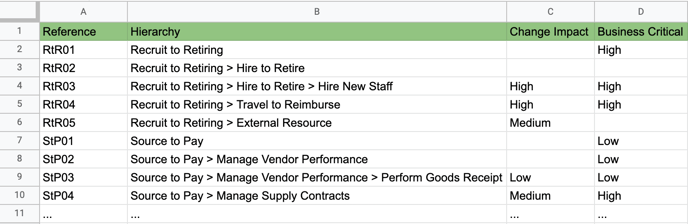 PLEASE NOTE. The Classifications will only be applied to the last item in the Hierarchy chain. For example, only 'External Resource' (row 6) will be given a Change Impact value of 'Medium'. 'Recruit to Retiring' will not. If you would like higher level items to be given optional fields, they must be specified in a different row, see 'Source to Pay' (row 7) & 'Source to Pay > Manage Vendor Performance' (row 8)
Step 3 - Download the spreadsheet into a CSV format.
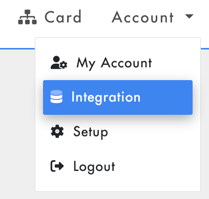
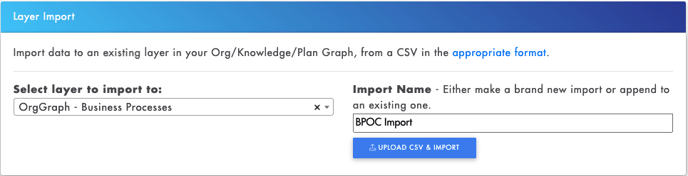
Step 4 - Open the Integration tab on FusionGraph.
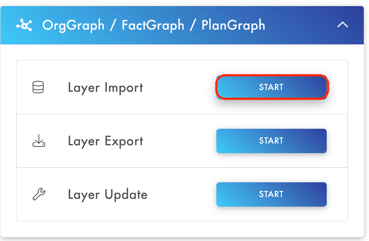
Step 5 - Click OrgGraph / FactGraph / PlanGraph and Start on Layer Import.
Step 6 - Layer Selection
Select which layer you want to import to & give your import an appropriate name. Then press 'Upload CSV & Import' and select your Downloaded CSV.
 Error Checking:
- If you see 'Unable to determine Reference column from imported CSV' then your CSV does not contain a column called 'Reference'. To fix this rename your reference column header to 'Reference' and try again.
- If you see 'WARNING! Duplicates of the following Reference names were found...' then your reference column is not unique. You may continue with the import, although items with the same reference may not be imported correctly. To fix this check your reference column for duplicate values and try again.
If all has gone well you should see a CSV Import Summary table.
STEP 7 - CSV Import Summary Table
Each column of the imported CSV has been turned into a row on this table. The Reference column and the Hierarchy column, containing the item names, have been automatically assigned. By default, Classification connections will not be imported. To import them, click on 'Classification' then from the dropdown select which classification it refers to.
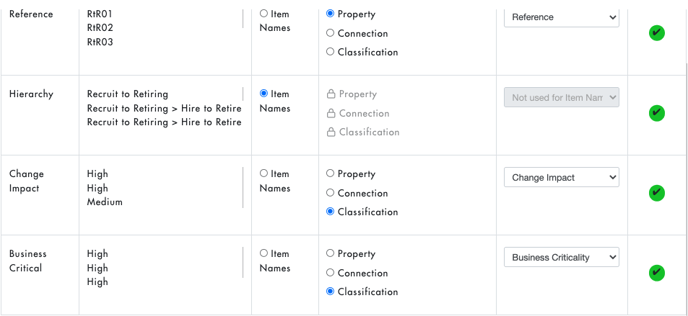 PLEASE NOTE: If you accidentally click Property/Connection/Classification for a column you do not want to import. You can select 'Do NOT Import This Column' from the dropdown to deselect it.
STEP 8 - Finish Import
Once every row has a ✅ you can press 'Finish Import' to start importing the data into FusionGraph. For large BPOCs this may take a while and will continue in the background, you can check the process in the 'Draw Specific Import Area'.
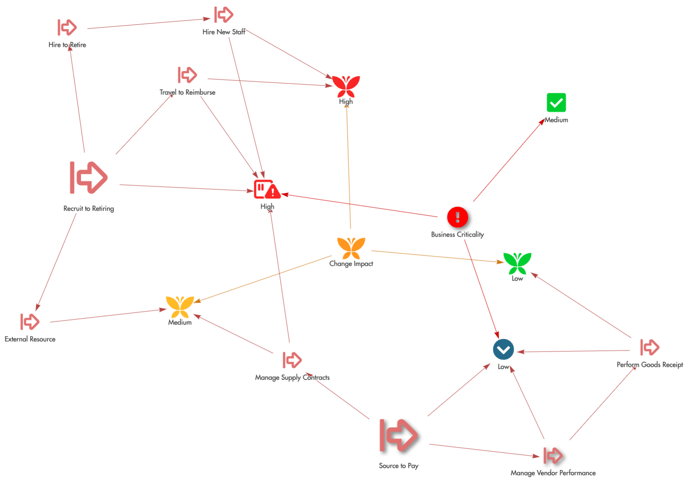
Below is a screenshot of the example spreadsheet on the Canvas view. You can draw this by selecting the Import from the Left Hand fly out.