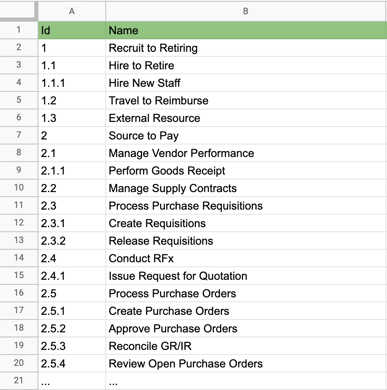
Step-1 Setting up the Spreadsheet.
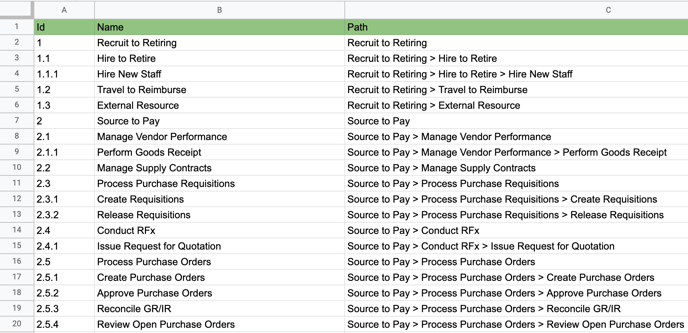
The Hierarchy Converter takes a Hierarchy ID and a item name and converts them into hierarchical format for use in the Layer Import and Update.
For example, this can be used to create a Business Process Catalogue with the correct hierarchy format where the item names are appended and split up by '>'.
In the example below 'Recruit to Retiring' is a level 1 item, 'Hire to Retire' is a level 2 item underneath 'Recruit to Retiring' and 'Hire New Staff' is a level 3 item underneath 'Hire To Retire'. Also, 'Travel to Reimburse' is then the second level 2 item underneath 'Recruit to Retiring' and so on.
(See the bottom of this page for an example of how the hierarchy path column will look).
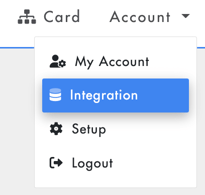
Step-2 Open the Integration Tab.
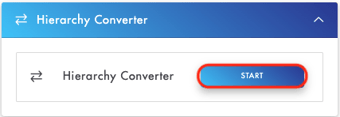
Step-3 Click on Hierarchy Converter and press 'START'.
Step-4 Click 'Upload CSV & Convert' and upload your CSV.

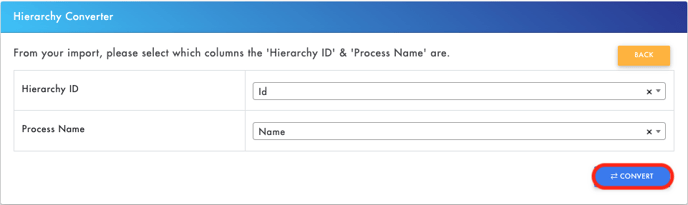
Step-5 Select which column the Hierarchy ID and Process Name are, then press 'Convert'.
In our example the 'Id' column is the Hierarchy ID & the 'Name' column is the Process Name.
A CSV like the one below will be downloaded with the hierarchy path correctly set based on the hierarchy Id values: