OrgGraph is where you describe the things that make you unique, and how everything interconnects. It allows you to connect business context with your technology landscape to create a solid platform for digital transformation.
FactGraph covers the other information about your business that is not usually captured in a formal way. This can be 'tacit' information that some people may be aware of but everybody may need to know.
These can relate back to your OrgGraph for example where Workarounds are used in the business because the business process or application does not support the business, where problems or inefficiencies exist, and where process risks and controls are in place.
PlanGraph items are activities based on a timeline that represent what you are doing (or may do in the future). This can include Projects and Plans, or Business Benefits.
These can be connected up to the items in your OrgGraph or FactGraph.
To add data items into FusionGraph...
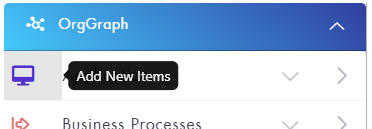
1. Open the relevant Graph section and click the Options button to open the drop down menu for the layer you wish to add an item for.
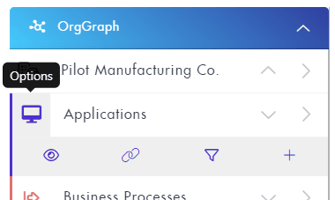
Or select the parent Graph item and do the same.
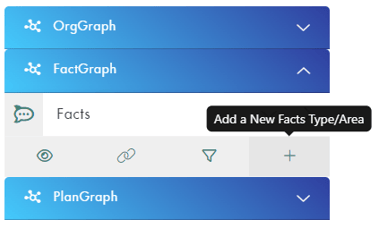
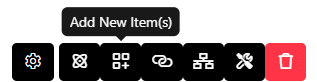
2. Click on the + button to add new items.
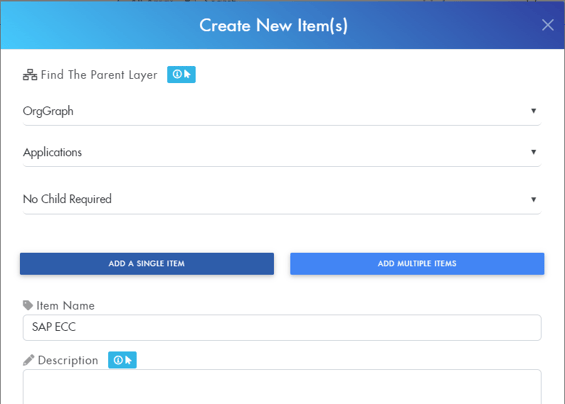
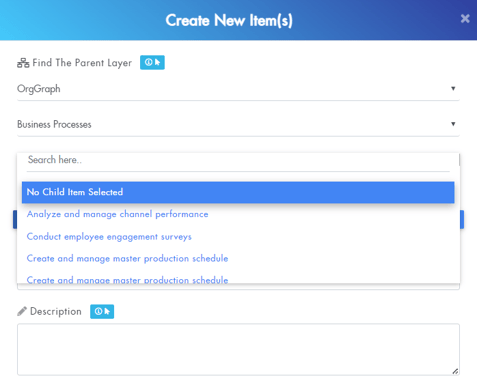
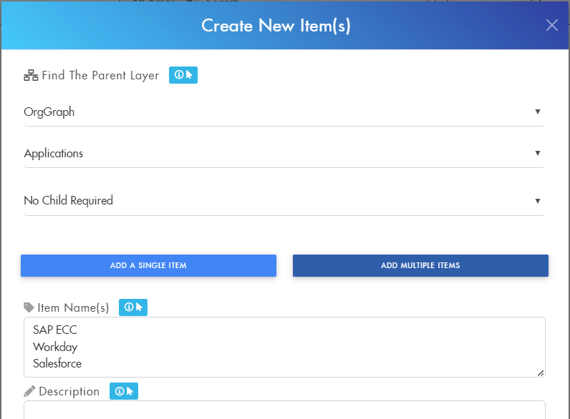
3. Select the reference layer (e.g. Applications) if not already selected and enter your item name and details.
A search box is available in the Create New Items screen to allow parent items to be more easily found especially where there are many items in the list.
You can add a single item or create multiple items at the same time by adding a list of item names on separate lines and then maintaining the properties for each afterwards:
Notes:
When creating items you can:
- Use the top 3 dropdown fields to specify whether they are part of the OrgGraph, FactGraph or PlanGraph
- Choose which data layer they belong to
- Choose whether you wish the item to be created as a child of another item. For example, you might create a Geography data item as Europe and then create children underneath Europe to represent countries or locations.
- It is also possible to add new items via the Advanced toolbar. If you first select an it item will pre-populate the 3 dropdown fields but these can be manually changed if needed.
- New items can also be added in the Matrix, Card and Timeline views in the same way by either clicking the layer icon:
Or by using the Add New Item(s) toolbar button: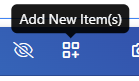
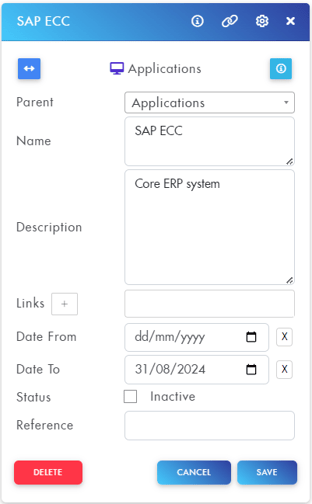
4. Once created your item(s) will appear on the canvas and you can double-click them to open the properties to fill in the details such as the description, from and to dates, reference, etc.