How to use the Matrix Builder to create customized views of your organization
A Matrix view is built within FusionGraph to help view the data in your organisation in a tabular format. Its view is optimised to improve usability and performance by grouping the properties and classifications of specific layers for a clearer, more organised display of the data.
How to build a Matrix view
To build a Matrix view select the Matrix tab at the top of the screen.
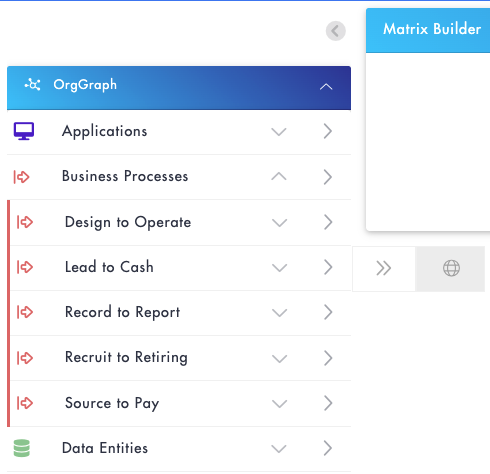
Then select the required parent layer that you wish to view from the left hand side bar
.
From here you can select the information that you wish to be included in the Matrix view by selecting the option for the depth of data that you wish to start from. This is useful for data that is hierarchical like business processes and geographies.
Level 1 (>) , Level 2 (>>) or All Levels.
For example the screenshot below will build the Matrix view for items of all Levels in the 'Applications' layer.
You can also start a Matrix view by clicking the down chevron on any layer and selecting an item within the layer. For example the screenshot below will build the Matrix view for items of all Levels below 'Lead to Cash' (Including 'Lead to Cash' itself).

More layer items can be added to the Matrix by selecting the relevant ones from the left hand menu. Note that once a parent layer is selected, only layers that have a connection to the parent layer can then be added.
Load Specific Items
When adding items to the Matrix you can search and filter the items to be added rather than adding all the items for a specific layer. This is useful for Business Processes where 100s or 1000s of items might exist and you only want to load ones that meet a specific criterial such as a classification value, property or connection.
To do this a new search option is now available in a layers flyout menu.
A popup appears to allow layer items to be searched for or filtered with the option to add just the selected item or the item and its immediate / all children.
When using the filter it's possible to choose layer items that match the entered filter criteria and only those matching this will be added to the Matrix:
Create New Items
You can create new items and add them to the Matrix by clicking the icon to the left of the layer you wish to add to, or by using the ‘Add New Item(s)’ button in the menu bar.
When an item is created or deleted, the Matrix will need to be refreshed to reflect these changes within the view.
.png?height=120&name=fusion-graph-white%20(1).png)